
How to Dutch Baby
Without delay, let's just get into this shall we? The beauty of the Dutch Baby is its simplicity. It's the kind of dish that looks impressive without the headache and is easily adapted to whatever you have on-hand. It really comes down to four things. Ready?
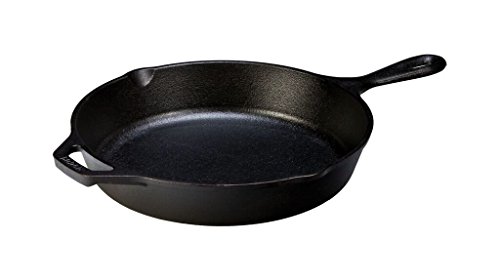
1. Pan
Personally, I suggest a cast iron skillet but any oven safe pan will work. I like Lodge Cast Iron for both function and affordability but again, as long as it’s oven friendly you should be good. The reason for this is because you are going to melt the butter on the stove top before poring the batter in and then transferring it to cook in the oven.
2. Basic Batter
I'm talking three ingredients basic...
2 eggs + 1/2 cup milk + 1/2 cup flour = batter
3. Butter
Butter you could say is an additional ingredient however, it's really more about the butter's role in the cooking process and its relationship to your pan. The goal is a "pool" of butter. Contrary to everything you think you know about butter being some evil fat, trust me when I tell you that the butter is your workhorse. Do yourself a favor and buy quality and use it generously. You want enough butter to melt and swirl around the pan, coating all sides with plenty to pool in the pan when completely melted. I typically use about a 1/2 stick. You can certainly get by with less but I find that doing so influences the puff factor and that puff is what it's all about! The butter helps the batter develop a terrain of sorts, and the nooks and crannies take-on almost a croissant type characteristic. Butter makes the pastry... end of story.
4. Toppings
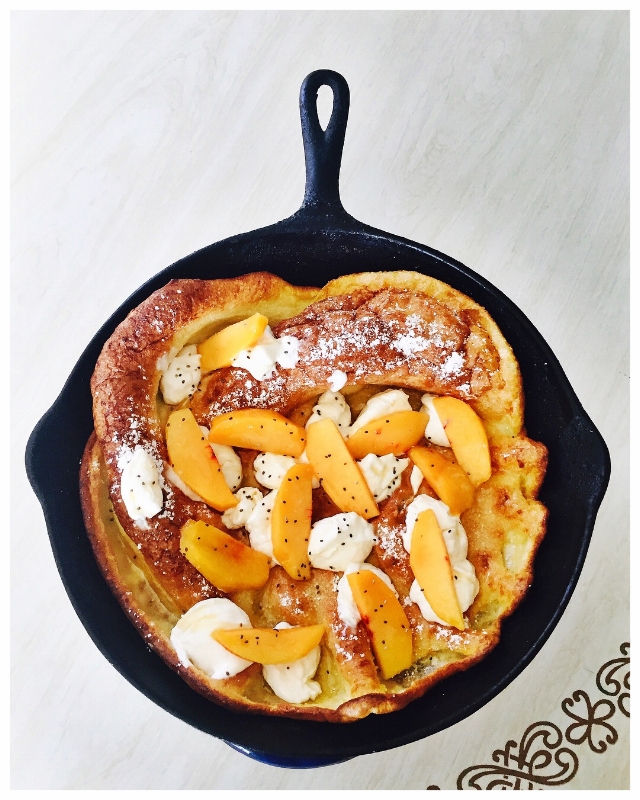
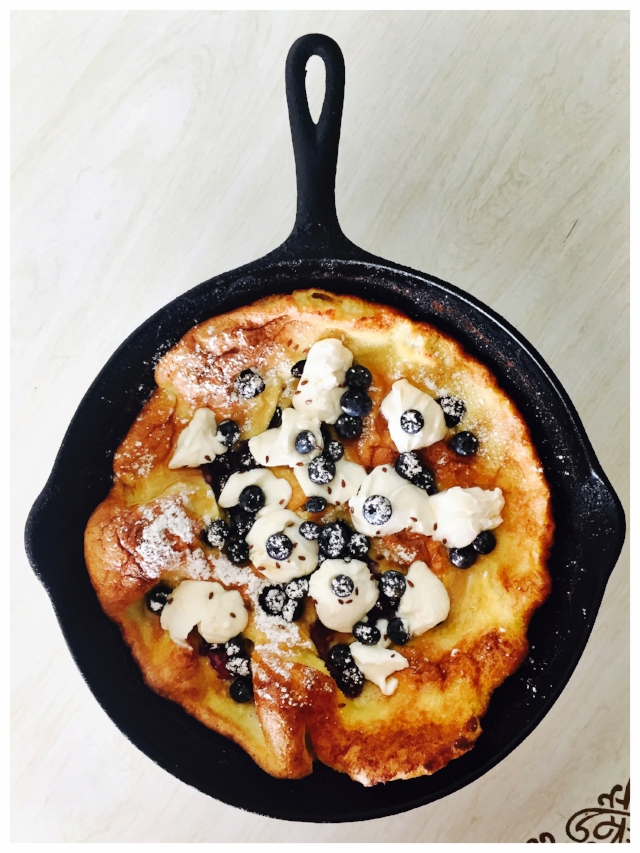
Ok, this is where your creativity gets its license. The most basic of Dutch Baby presentations might consist of a sprinkle of powdered sugar and a squeeze of lemon juice. Tasty? Yes. Nutritionally sound? Not so much... I personally prefer to enhance the nutritional density of my Dutch Babies by including the following formula:
creamy + fresh + drizzle + sprinkle = topping
Doing so adds more nutritional value thereby helping to reduce a carb heavy spike in blood sugar. I try to add things to help boost protein and fiber like nuts and seeds, dairy products, and fresh fruit. As for assembly, below is a list of some things I commonly use in each category.
Creamy items: Yogurt, ricotta cheese, cream cheese, whip cream, etc... These item tend to soften when met with the hot Dutch Baby and help mix the other toppings into a delicious mixture of yum! I'm not sure how else to describe it, but it's for this very reason I prefer to add my cream item first. It also serves as a landing pad for the other toppings.
Fresh stuff: I typically use fruit but veggies could work too. I like berries or things sliced kinda small to scatter around whatever creamy base I used.
Drizzles: Honey and syrups are my go-to drizzles but occasionally I'll stew some fruit (especially if I'm using frozen fruit) for a hybrid of the fresh and the drizzle.
Sprinkles: Nuts, seeds, herbs, powdered sugar, or any specialty sugar or spices... This is the final zing! It's the small touch of detail to garnish the Dutch Baby before serving.

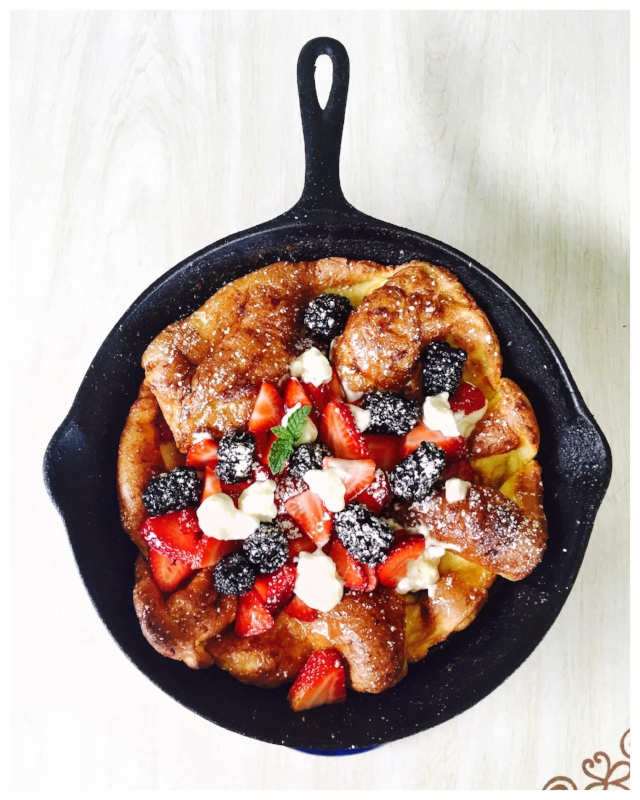
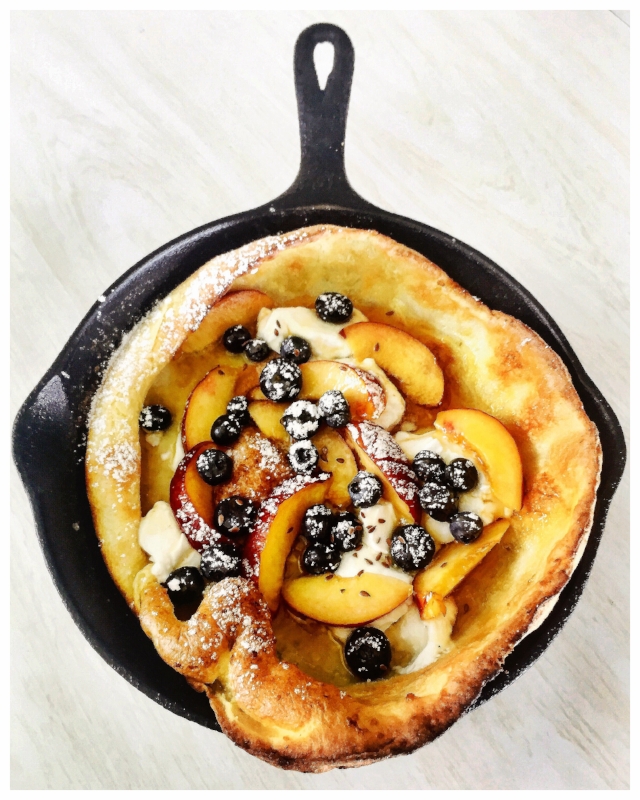
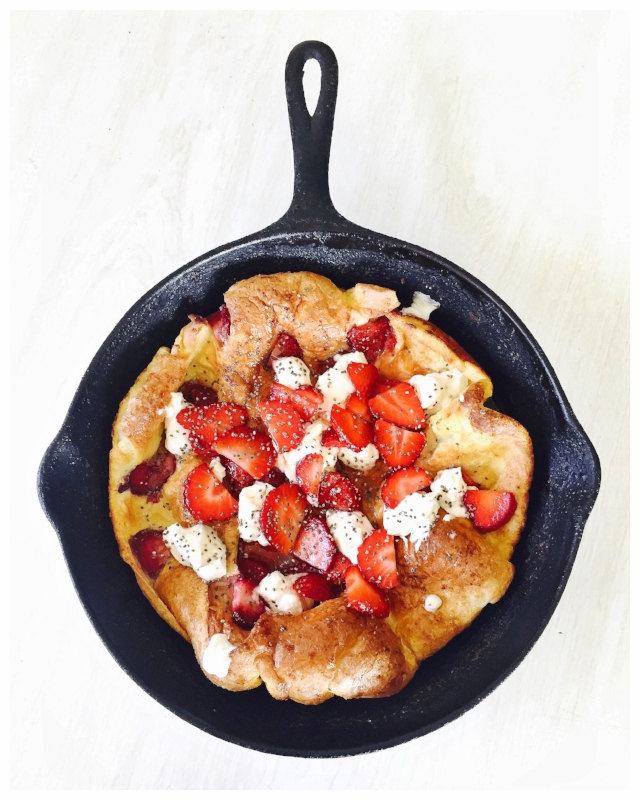
A naked Dutch Baby showcasing the ideal topography/terrain. Lots of buttery nooks and crannies to help catch all the toppings you want to pile on!
And, since we are on the subject, I'll just say that the serving is "important". This is the point where the wow factor is at its all time high. From watching the Dutch Baby rise while its in the oven, to getting it all gussied up with its toppings, it just doesn't get much better than that moment so be sure to parade it around before serving. For real though! Cause as soon as you cut into your creation, it takes on a life of its own. The baby deflates much like a souffle, and the toppings all run together which remember, is the great part of applying the creamy product first, but what you gain in taste you start to lose in appearance. The toppings pretty much spill out into the pan as you remove the pastry slice by slice but just scoop it up and throw it on your plate. This isn't a post about how you eat a Dutch Baby. This is merely telling you how you can go about creating your own. I'll quickly share that I eat mine with my hands, taco style wrapping the pastry around the fruity-creamy mess and I dredge whatever's in hand right on through any remaining butter! It's not pretty but its sure tastes good so, no shame here!
Ingredients
- 2 eggs
- 1/2 cup milk
- 1/2 cup flour
- 1/2 stick butter
Directions
- Preheat oven to 410 degrees F.
- Mix the eggs, milk and flour together in a bowl until thoroughly combined.
- In an oven safe skillet, melt the butter on the stove stop.
- Carefully swirl the butter in the pan and around the edges to coat all sides.
- Pour the batter into the pan and carefully transfer it to the oven.
- Bake for 13 minutes at 410 degrees F, then turn the oven down to 350 degrees F and bake for another 10 minutes.
- I strongly encourage watching your Dutch Baby change shape through the oven window (cheap thrills!) but whatever you do, don't open the oven door until it is finished cooking or it will begin to deflate.
- When it's done baking, remove it from the oven and top it with the topping combo you decide. Chef's choice!
- Slice and serve. Or hoard? Just saying...
PS- a fitness related post is coming soon cause... duh!
How to Feed a Senior is a participant in the Amazon Services LLC Associates Program, which is an affiliate advertising program. If you choose to purchase items after clicking on these links, I will earn a small commission at no extra cost to you.