Of Grain and Grain  |  Tactile Explorations of Flour and Wood

By Ashley Look

  • Blog
  • Flour
  • Wood
  • Shop
  • Services
  • Events
  • About
  • Contact
  • Search
Full Moon Baking Club’s November 2018 bread: Cranberry Sauce Bread

Full Moon Baking Club’s November 2018 bread: Cranberry Sauce Bread

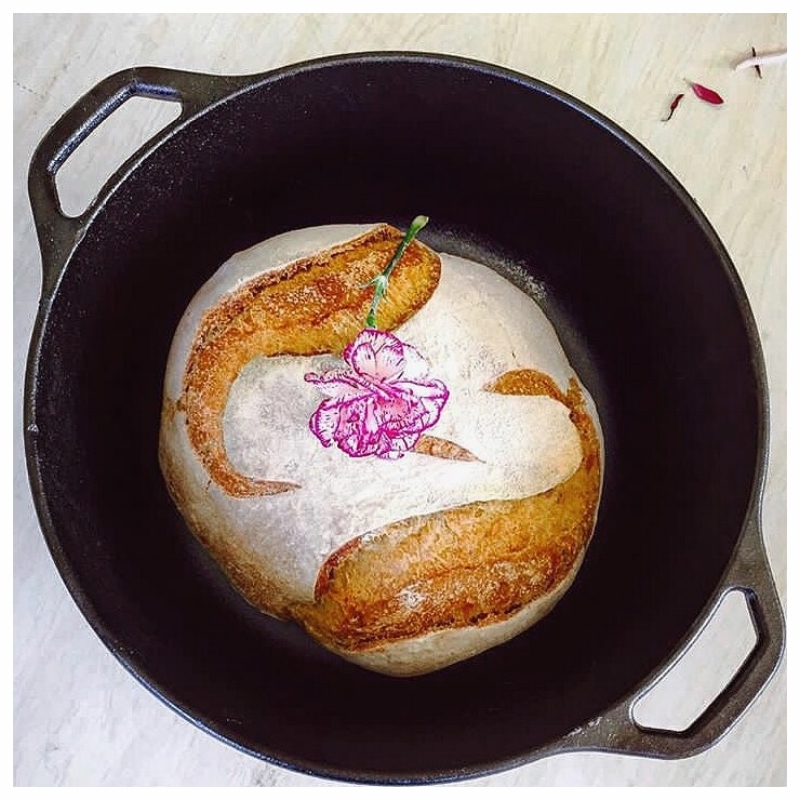
November 2018: Cranberry Sauce Bread

December 07, 2018 by Ashley Look in Full Moon Baking Club, Recipes

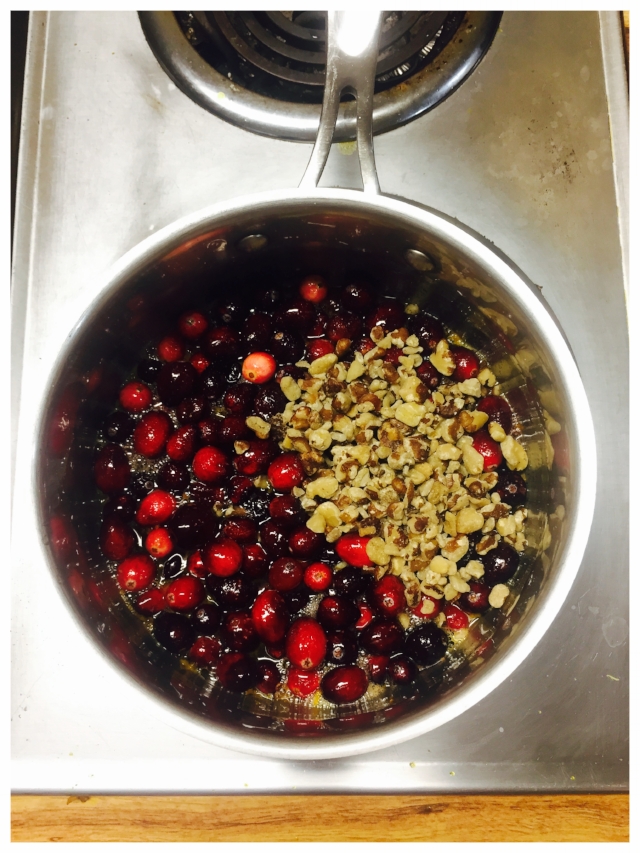
With the November 2018 full moon falling the day after Thanksgiving, cranberry sauce was begging to be a signature ingredient for the Full Moon Baking Club. Every year I make a cranberry sauce and every year I have leftovers. So this year, I made sauce with a plan. One of my favorite bakeries, Pain D’Avignon in Hyannis, MA makes these delicious cranberry-pecan rolls so I wanted a cranberry sauce that could steer me in that direction. I made this cranberry sauce using some during my Thanksgiving meal and the rest in this bread. It used walnuts instead of pecans but… close enough. My goal was texture.

Speaking of texture, I baked this bread in a dutch oven because it makes a world of difference when it comes to the crust. If you want that crispy/chewy/artisan bread effect at home, bake your breads in a dutch oven. The lid helps trap moisture and produces steam while baking. That humid baking environment, matched with high heat equals crusty loaves that mimic professional bakery results. It’s one of the simplest answers to creating rustic breads in an everyday home kitchen.

If you find yourself needing a dutch oven, I recommend the one linked below made by Lodge Cast Iron. There are a lot on the market, some quite a bit more expansive than others but I prefer this one because it’s affordable, comes pre-seasoned and is made entirely of cast iron. Some have nobs on the lids with a lower heat tolerance than the pot which can throw off one’s cooking plan. Whatever style you prefer, just make sure it’s safe for high temperatures. You’ll need it to handle temperatures of at least 450 degrees for breads.

Lodge L8DOL3 Cast Iron Dutch Oven with Dual Handles, Pre-Seasoned, 5-Quart
Lodge

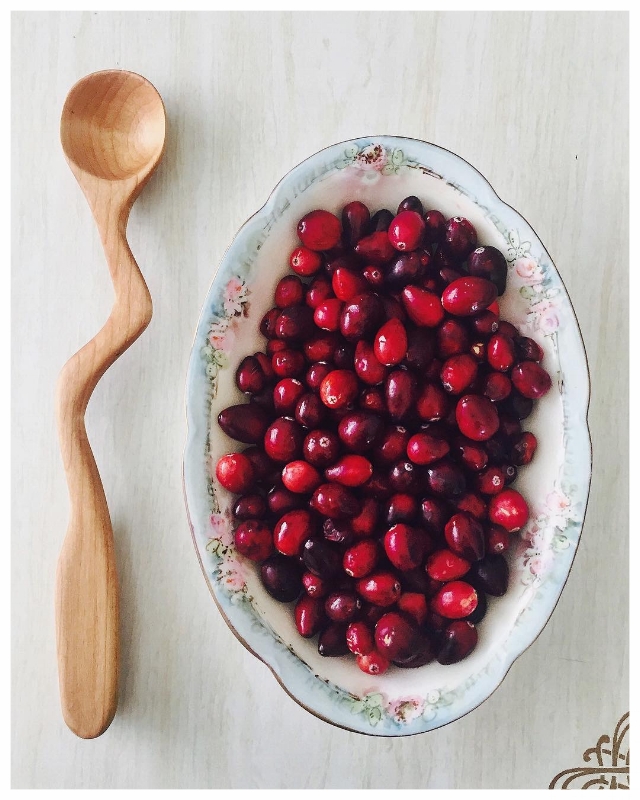
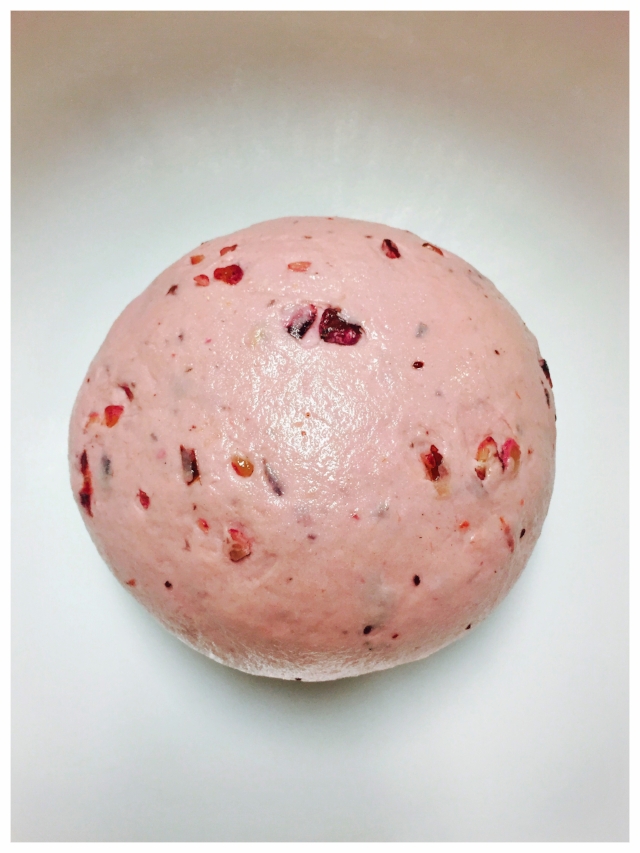
I forgot to take pictures of the bread in progress so hopefully you checked-out the video when it was all going down on Instagram The high was making pink dough. The low was a mild panic where it suddenly occurred to me I was making a fruit cake. Otherwise, you didn’t miss much. I did however snag a few shots of the cranberry sauce in the works. Also, if you need a holiday gift, this mixing spoon and several others are still available.

Canberry sauce.jpg Cranberries.jpg dough.jpg

Ok bakers, it’s time to get on with this recipe because there are only two weeks till the next full moon. Do you even still have cranberry sauce? Probably not and that’s my fault for being so slow on posting the recipe but all the more reason to archive this recipe for next year! Or, if you’re really game to make bread (which you should be), I encourage you go for it! Just omit the cranberry sauce and see what happens. You might be pleasantly surprised. That’s the beauty of bread. With a little practice, you’ll find it’s a very forgiving art.;)

Ingredients

  • 1 cup warm water
  • 1 cup cranberry sauce
  • 2 tsp. active dry yeast
  • 3 cups flour
  • 1 tsp. salt

Directions

  1. In a bowl mix together the water and cranberry sauce.
  2. Add the yeast and let it disolve.
  3. In a separate, large bowl, stir together the four and salt.
  4. Pour the cranberry mixture into the bowl with the flour and mix to combine.
  5. Mix the ingredients together helping to form the dough.
  6. Gently form the dough in the bowl, then turn it out onto a floured surface.
  7. Knead the dough on the counter for at least 10 minutes, adding more flour as necessary to keep it from sticking.
  8. The dough should become smooth and springy with all ingredients throughoughly combined. Keep kneading if feeling unsure about the consistancy. It's practically impossible to over-knead dough by hand and if anything, more kneading will only improve the texture.
  9. Once well formed, shape it into a ball and place in an oiled bowl, cover it, and let it rest/rise for an hour or until doubled in size.
  10. Once doubled, knead it again for another 10ish minutes, dusting with flour to keep it from sticking if necessary.
  11. After kneading, shape into a round form and place smooth side up on a piece of parchment paper and cover with plastic wrap or a damp cloth. (I like to place my dough and parchment on a pie plate to help keep the round shape during the second rise.)
  12. Let it rise for another hour or until doubled in size.
  13. Preheat the oven and your dutch oven to 450 degrees F.
  14. When the dough is ready, carefully transfer the parchment paper with the dough into the dutch oven. Cover with the lid and bake for 25 minutes.
  15. Next, remove the lid and reduce the temperature to 410 degrees F. Bake for 15 more minutes or until the inside temperature reaches 190 degrees F.
  16. Cool on a rack for 20ish minutes before slicing.
Sliced.jpg

Ok folks, we got two weeks! The holiday and the Full Moon Baking Club countdowns are on so lets role with the festive and make Eggnog Bread! Do people even like eggnog? Probably not, yet somehow it winds up in the fridge every year. Well, this year we are gonna use it up! Eggs, milk and sugar can make for a tasty loaf so let’s just do it and embrace the holiday spirit. And since the full moon is on the 22nd of December, we can count on some leftovers to make holiday french toast.

See you in a couple of weeks! And if you made it this far and have no idea what the Full Moon Baking Club is click here, catch-up, and join us on the 22nd!


How to Feed a Senior is a participant in the Amazon Services LLC Associates Program, which is an affiliate advertising program. If you choose to purchase items after clicking on these links, I will earn a small commission at no extra cost to you.

December 07, 2018 /Ashley Look
how to feed a senior, Full Moon Baking Club, Full Moon, Cranberry sauce, cranberry bread, Thanksgiving, holidays, Pain D'Avignon, Hyannis, Cranberry pecan, Dutch Oven, Lodge Cast Iron, walnuts, crust, texture, artisan bread, home kitchen, mixing spoon, holiday gift, Cranberry Sauce Bread, Eggnog, french toash
Full Moon Baking Club, Recipes
Comment
A holiday gift guide for the culinary inclined, sure to delight cooks, bakers, and inspired chefs alike.

A holiday gift guide for the culinary inclined, sure to delight cooks, bakers, and inspired chefs alike.

A Holiday Gift Guide For The Culinary Inclined

November 29, 2018 by Ashley Look in Recipes

It’s the holiday season and I have put together the first ever, How to Feed A Senior gift guide, full of my favorite culinary things. Ok… that’s probably not true. There isn’t room for all such favorites but, there are a few item I highly recommend. I thought it would be fun to compile a list and share these suggestions with you Most these items are available on Amazon, and in full disclosure I must tell you, I am part of their affiliate program. That probably doesn’t mean much to you, but it means the world to me to have you purchase Amazon products through my website. I get a small kickback (like a commission) from sales that come at no extra charge to you! So, thank you in advance for visiting this page and your support throughout the holiday season (and always!). I assure you the items recommended below are listed because I love them and I hope you will too.

For Chefs

The first gift guide I’m releasing is geared to those who love to cook. If you frequent this website then you know food is it’s center, so naturally a focus on culinary gifts is a must! It would be amiss to forgo the mention of a cookbook or two but when it comes to cooking, the culinary arts really shine when creativity is put to the test. Cookbooks full of recipes are great for step-by-step instructions and photo inspiration but if your goal is to foster one’s inner chef, then don’t give them a cookbook. Give them a Flavor Bible! The Flavor Bibles are not traditional cookbooks. They don’t contain recipes but instead, offer common food pairings allowing cooks to get creative in the kitchen. For example, let’s say you have tons of beets but little clue as to what to make. Well, just flip to the page for beets and you’ll see a list of complimentary ingredients. When you know what flavors profiles work well together, creating original recipes becomes a breeze. I highly, HIGHLY recommend these books! You do not however need both. I just happen to be a complete fan-girl and listed them both for convenience.

FYI: I removed both the cover jackets so don’t be alarmed if they look a little different online.

FB Bindings.jpg FB Flat.jpg FB Detail.jpg
The Flavor Bible: The Essential Guide to Culinary Creativity, Based on the Wisdom of America's Most Imaginative Chefs
By Karen Page, Andrew Dornenburg
The Vegetarian Flavor Bible: The Essential Guide to Culinary Creativity with Vegetables, Fruits, Grains, Legumes, Nuts, Seeds, and More, Based on the Wisdom of Leading American Chefs
By Karen Page

For Bakers

Ok, this is a bit of a shameless plug but what baker doesn’t love a wooden spoon? And these aren’t just your average wooden spoons. These are hand-carved, sustainably made, one-of-a-kind, wooden spoons! I’m talking some serious functional art in which beautiful designs equal beautiful kitchen tools. Below are two mixing spoons that might just earn you some baked goods in return.

Cadence 2 Cadence 2
Sold Out
Cadence 2
$68.00

 Hand carved, basswood mixing spoon.

Walnut Mixer Walnut Mixer
Sold Out
Walnut Mixer
$73.00

Hand-carved, walnut wood mixing spoon.

For Both

Speaking of baking, another favorite kitchen tool is The Baking Journal by Magma Books. I use it to document impulse recipes and it’s been especially handy for managing the Full Moon Baking Club and quick recipes for Instagram posts. It includes blank pages for notes, a section for organizing recipes, a place for reviewing cafes and restaurants and several pages of useful tips, conversions, and reference information. For folks that are not exactly bakers but still love cooking, they might prefer The Food Journal which is very similar in design. They are basically scrapbooks for foodies but less paper craft and more for documenting thoughts, ideas and adjustments. And again, I’m telling you about these journals because I own both and recommend them because I use them!

Food Journals.jpg FJ Binding.jpg FJ details 1.jpg FL details 2.jpg Extras.jpg
The Baking Journal: A Scrapbook for Bakers
By Magma Books, Aaron Tan
The Food Journal: A Scrapbook for Food Lovers
By Magma Books, Marco Donadon

My final culinary must-have is a cast iron skillet! Every kitchen needs at least one. They are the heirloom of pans, if ever there was such a thing, cause they will last a life time and them some. Lodge Cast Iron is a quality brand that is very affordable and preseasoned for immediate use. I own three different skillets in three different sizes, a dutch oven, and a few specialty items which is to say, I can’t recommend them enough! Below is a link to the skillet size I use most but I encourage you to browse their other designs because they have all kinds of kitchen delights! I’ve included a photo gallery of things I’ve made in using my collection to highlight their versatility. They are also fantastic pieces for camping trips or times when you need to cook over a fire.

Mixed Berry.JPG IMG_6135.JPG IMG_4476.JPG Cinnamon rolls with cream cheese frosting.jpg IMG_7399.JPG IMG_5432.JPG
Lodge 10.25 Inch Cast Iron Skillet. Pre-Seasoned Cast Iron Skillet Pan for Stovetop of Oven Use
Lodge Logic

I’ve gotta keep this list short because I have two more gift guide to create but comment any favorite kitchen items or culinary suggestions you think would make great gifts. I’d love to hear your recommendations

Also, caregivers and spoon carvers, your guides are next! Stay tuned for those suggestions. they’re coming soon!

November 29, 2018 /Ashley Look
how to feed a senior, culinary holiday gift guide, holiday gift guides, gift guides for chefs, gift guides for bakers, Lodge Cast Iron, The Flavor Bible, Amazon, 2018 holiday gift guide, cast iron skillet, cookbooks, wooden spoons, Cadence 2, Walnut Mixer, hard carved wooden spoons, baker's delight, Full Moon Baking Club, Food Journal, Baking Journal, Scrapbook for Food Lovers, Scrapbook for Bakers, recipes, creating original recipes, Dutch Oven, heirlooms, organizing recipes, Christmas shopping, holiday shopping
Recipes
Comment
Left toppings- Peaches & blueberries + yogurt + flax seeds + powdered sugar + honey...Right toppings- Blueberries + ricotta cheese + powdered sugar + maple syrup...

Left toppings- Peaches & blueberries + yogurt + flax seeds + powdered sugar + honey...

Right toppings- Blueberries + ricotta cheese + powdered sugar + maple syrup...

How to Dutch Baby

August 26, 2018 by Ashley Look in Recipes

Without delay, let's just get into this shall we?  The beauty of the Dutch Baby is its simplicity.  It's the kind of dish that looks impressive without the headache and is easily adapted to whatever you have on-hand.  It really comes down to four things.  Ready?

1. Pan

Personally, I suggest a cast iron skillet but any oven safe pan will work.  I like Lodge Cast Iron for both function and affordability but again, as long as it’s oven friendly you should be good. The reason for this is because you are going to melt the butter on the stove top before poring the batter in and then transferring it to cook in the oven.  

Lodge 10.25 Inch Cast Iron Skillet. Pre-Seasoned Cast Iron Skillet Pan for Stovetop of Oven Use
Lodge Logic

2. Basic Batter 

I'm talking three ingredients basic...

2 eggs + 1/2 cup milk + 1/2 cup flour = batter

3. Butter

Butter you could say is an additional ingredient however, it's really more about the butter's role in the cooking process and its relationship to your pan.  The goal is a "pool" of butter.  Contrary to everything you think you know about butter being some evil fat, trust me when I tell you that the butter is your workhorse.  Do yourself a favor and buy quality and use it generously.  You want enough butter to melt and swirl around the pan, coating all sides with plenty to pool in the pan when completely melted. I typically use about a 1/2 stick.  You can certainly get by with less but I find that doing so influences the puff factor and that puff is what it's all about!  The butter helps the batter develop a terrain of sorts, and the nooks and crannies take-on almost a croissant type characteristic.  Butter makes the pastry... end of story.

4. Toppings

Ok, this is where your creativity gets its license.  The most basic of Dutch Baby presentations might consist of a sprinkle of powdered sugar and a squeeze of lemon juice.   Tasty?  Yes.  Nutritionally sound? Not so much...  I personally prefer to enhance the nutritional density of my Dutch Babies by including the following formula:

creamy + fresh + drizzle + sprinkle = topping

Doing so adds more nutritional value thereby helping to reduce a carb heavy spike in blood sugar.  I try to add things to help boost protein and fiber like nuts and seeds, dairy products, and fresh fruit.  As for assembly, below is a list of some things I commonly use in each category.

Creamy items: Yogurt, ricotta cheese, cream cheese, whip cream, etc... These item tend to soften when met with the hot Dutch Baby and help mix the other toppings into a delicious mixture of yum! I'm not sure how else to describe it, but it's for this very reason I prefer to add my cream item first.  It also serves as a landing pad for the other toppings.

Fresh stuff: I typically use fruit but veggies could work too.  I like berries or things sliced kinda small to scatter around whatever creamy base I used.

Drizzles: Honey and syrups are my go-to drizzles but occasionally I'll stew some fruit (especially if I'm using frozen fruit) for a hybrid of the fresh and the drizzle.

Sprinkles: Nuts, seeds, herbs, powdered sugar, or any specialty sugar or spices...  This is the final zing!  It's the small touch of detail to garnish the Dutch Baby before serving.

A naked Dutch Baby showcasing the ideal topography/terrain. Lots of buttery nooks and crannies to help catch all the toppings you want to pile on!

A naked Dutch Baby showcasing the ideal topography/terrain. Lots of buttery nooks and crannies to help catch all the toppings you want to pile on!

And, since we are on the subject, I'll just say that the serving is "important".  This is the point where the wow factor is at its all time high.  From watching the Dutch Baby rise while its in the oven, to getting it all gussied up with its toppings, it just doesn't get much better than that moment so be sure to parade it around before serving.  For real though!  Cause as soon as you cut into your creation, it takes on a life of its own.   The baby deflates much like a souffle, and the toppings all run together which remember, is the great part of applying the creamy product first, but what you gain in taste you start to lose in appearance. The toppings pretty much spill out into the pan as you remove the pastry slice by slice but just scoop it up and throw it on your plate.  This isn't a post about how you eat a Dutch Baby.  This is merely telling you how you can go about creating your own.  I'll quickly share that I eat mine with my hands, taco style wrapping the pastry around the fruity-creamy mess and I dredge whatever's in hand right on through any remaining butter!  It's not pretty but its sure tastes good so, no shame here!

Mixed Berry.JPG Ricotta with fruit.JPG Strwberry shortcake.JPG Peaches and Cream.JPG Blueberry ricotta and flax.jpg

Ingredients

  • 2 eggs
  • 1/2 cup milk
  • 1/2 cup flour
  • 1/2 stick butter

Directions

  1. Preheat oven to 410 degrees F.
  2. Mix the eggs, milk and flour together in a bowl until thoroughly combined.
  3. In an oven safe skillet, melt the butter on the stove stop.
  4. Carefully swirl the butter in the pan and around the edges to coat all sides.
  5. Pour the batter into the pan and carefully transfer it to the oven.
  6. Bake for 13 minutes at 410 degrees F, then turn the oven down to 350 degrees F and bake for another 10 minutes.
  7. I strongly encourage watching your Dutch Baby change shape through the oven window (cheap thrills!) but whatever you do, don't open the oven door until it is finished cooking or it will begin to deflate.
  8. When it's done baking, remove it from the oven and top it with the topping combo you decide. Chef's choice!
  9. Slice and serve. Or hoard? Just saying...

PS- a fitness related post is coming soon cause... duh!


 How to Feed a Senior is a participant in the Amazon Services LLC Associates Program, which is an affiliate advertising program. If you choose to purchase items after clicking on these links, I will earn a small commission at no extra cost to you.

August 26, 2018 /Ashley Look
How to feed a senior, dutch baby, toppings, batter, recipe, terrain, topography, butter, German pancake, formulas, cast iron skillet, creamy, drizzle, fresh, dairy, cream cheese, ricotta, berries, fruit, Lodge Cast Iron
Recipes
6 Comments
 
Search