Of Grain and Grain  |  Tactile Explorations of Flour and Wood

By Ashley Look

  • Blog
  • Flour
  • Wood
  • Shop
  • Services
  • Events
  • About
  • Contact
  • Search

Red Onion Tart with Beets and Feta

How To Feed A Senior
February 08, 2021 by Ashley Look in Recipes

Make his Red Onion Tart with Beets and Feta Cheese to show your loved ones you care. It has a soft and flaky crust that is sure to delight but it can also be omitted if you are preparing a meal for seniors with aging or sensitive teeth.

Read More
February 08, 2021 /Ashley Look
How To Feed A Senior, Red Onion, tart, beets, feta cheese, crust, soft and flaky crust, cream cheese, butter, balsamic vinegar, brown sugar, thyme, heavy cream, eggs, senior nutrition tips, meals for seniors, elderly loved one, caregiving, recipes for seniors, pie, pie crust, aging teeth, sensitive teeth, Valentine's Day recipe
Recipes
Comment
Left toppings- Peaches & blueberries + yogurt + flax seeds + powdered sugar + honey...Right toppings- Blueberries + ricotta cheese + powdered sugar + maple syrup...

Left toppings- Peaches & blueberries + yogurt + flax seeds + powdered sugar + honey...

Right toppings- Blueberries + ricotta cheese + powdered sugar + maple syrup...

How to Dutch Baby

August 26, 2018 by Ashley Look in Recipes

Without delay, let's just get into this shall we?  The beauty of the Dutch Baby is its simplicity.  It's the kind of dish that looks impressive without the headache and is easily adapted to whatever you have on-hand.  It really comes down to four things.  Ready?

1. Pan

Personally, I suggest a cast iron skillet but any oven safe pan will work.  I like Lodge Cast Iron for both function and affordability but again, as long as it’s oven friendly you should be good. The reason for this is because you are going to melt the butter on the stove top before poring the batter in and then transferring it to cook in the oven.  

Lodge 10.25 Inch Cast Iron Skillet. Pre-Seasoned Cast Iron Skillet Pan for Stovetop of Oven Use
Lodge Logic

2. Basic Batter 

I'm talking three ingredients basic...

2 eggs + 1/2 cup milk + 1/2 cup flour = batter
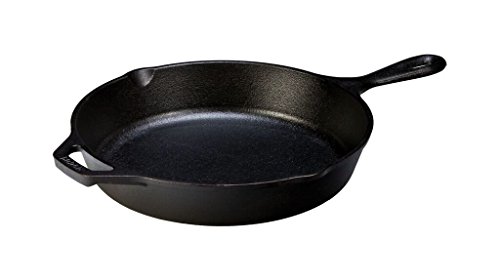
3. Butter

Butter you could say is an additional ingredient however, it's really more about the butter's role in the cooking process and its relationship to your pan.  The goal is a "pool" of butter.  Contrary to everything you think you know about butter being some evil fat, trust me when I tell you that the butter is your workhorse.  Do yourself a favor and buy quality and use it generously.  You want enough butter to melt and swirl around the pan, coating all sides with plenty to pool in the pan when completely melted. I typically use about a 1/2 stick.  You can certainly get by with less but I find that doing so influences the puff factor and that puff is what it's all about!  The butter helps the batter develop a terrain of sorts, and the nooks and crannies take-on almost a croissant type characteristic.  Butter makes the pastry... end of story.
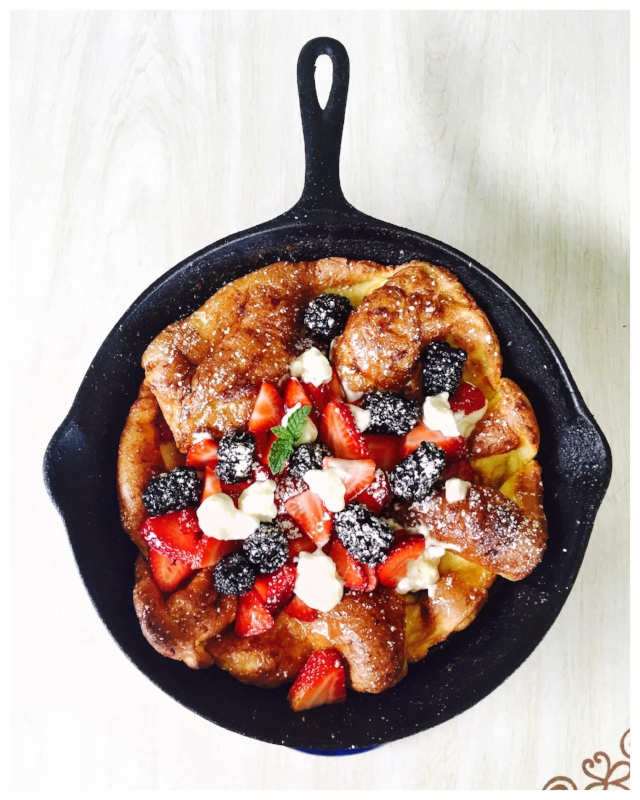
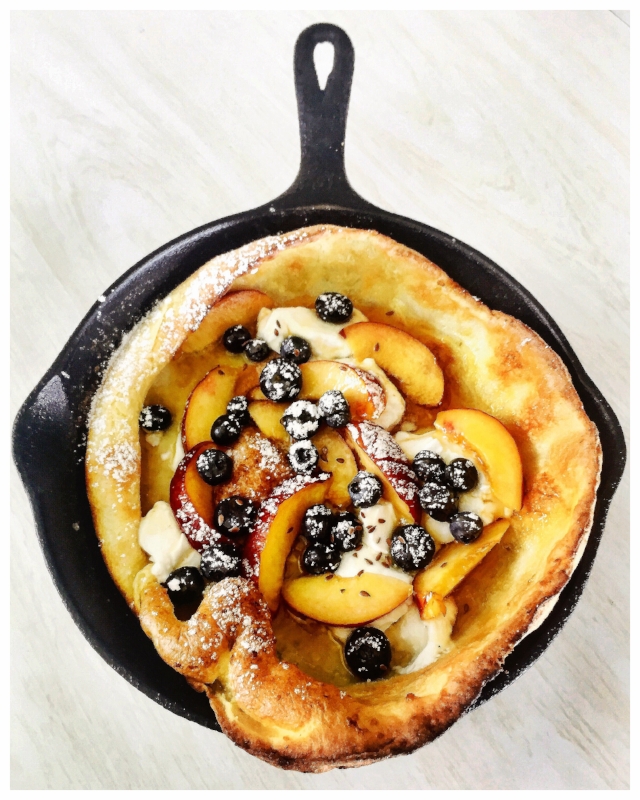
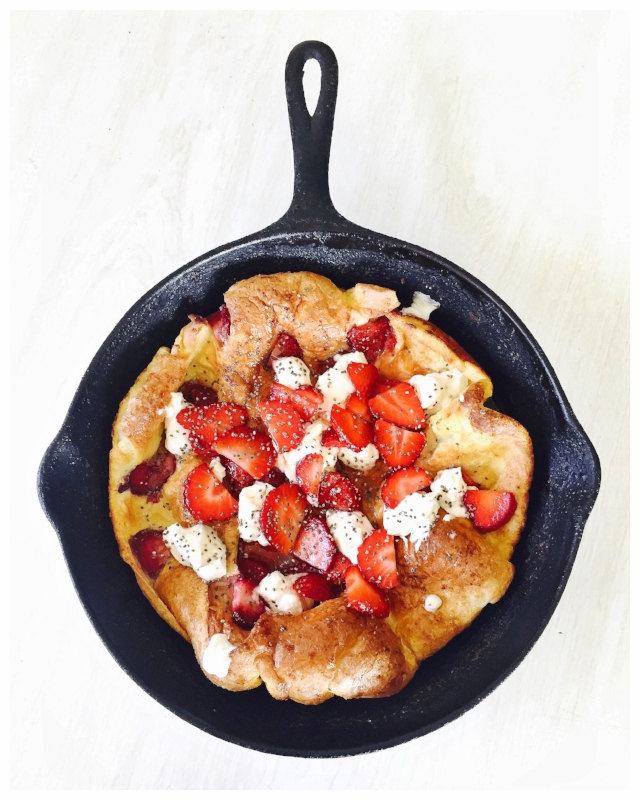
4. Toppings

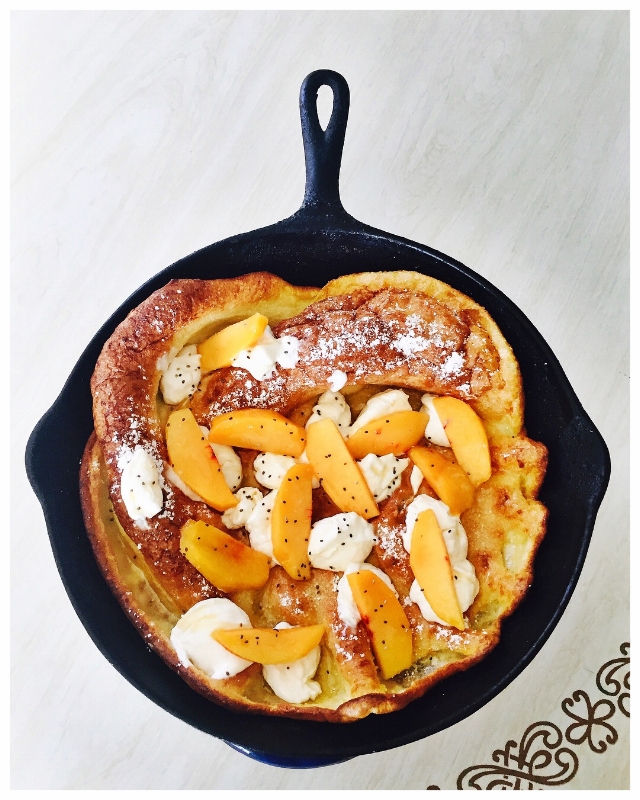
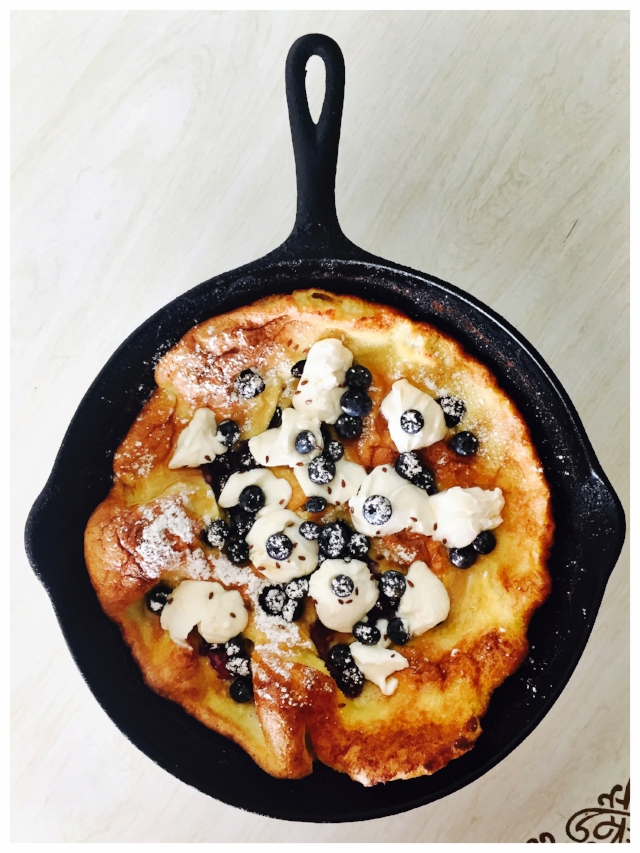
Ok, this is where your creativity gets its license.  The most basic of Dutch Baby presentations might consist of a sprinkle of powdered sugar and a squeeze of lemon juice.   Tasty?  Yes.  Nutritionally sound? Not so much...  I personally prefer to enhance the nutritional density of my Dutch Babies by including the following formula:

creamy + fresh + drizzle + sprinkle = topping

Doing so adds more nutritional value thereby helping to reduce a carb heavy spike in blood sugar.  I try to add things to help boost protein and fiber like nuts and seeds, dairy products, and fresh fruit.  As for assembly, below is a list of some things I commonly use in each category.

Creamy items: Yogurt, ricotta cheese, cream cheese, whip cream, etc... These item tend to soften when met with the hot Dutch Baby and help mix the other toppings into a delicious mixture of yum! I'm not sure how else to describe it, but it's for this very reason I prefer to add my cream item first.  It also serves as a landing pad for the other toppings.

Fresh stuff: I typically use fruit but veggies could work too.  I like berries or things sliced kinda small to scatter around whatever creamy base I used.

Drizzles: Honey and syrups are my go-to drizzles but occasionally I'll stew some fruit (especially if I'm using frozen fruit) for a hybrid of the fresh and the drizzle.

Sprinkles: Nuts, seeds, herbs, powdered sugar, or any specialty sugar or spices...  This is the final zing!  It's the small touch of detail to garnish the Dutch Baby before serving.

A naked Dutch Baby showcasing the ideal topography/terrain. Lots of buttery nooks and crannies to help catch all the toppings you want to pile on!

A naked Dutch Baby showcasing the ideal topography/terrain. Lots of buttery nooks and crannies to help catch all the toppings you want to pile on!

And, since we are on the subject, I'll just say that the serving is "important".  This is the point where the wow factor is at its all time high.  From watching the Dutch Baby rise while its in the oven, to getting it all gussied up with its toppings, it just doesn't get much better than that moment so be sure to parade it around before serving.  For real though!  Cause as soon as you cut into your creation, it takes on a life of its own.   The baby deflates much like a souffle, and the toppings all run together which remember, is the great part of applying the creamy product first, but what you gain in taste you start to lose in appearance. The toppings pretty much spill out into the pan as you remove the pastry slice by slice but just scoop it up and throw it on your plate.  This isn't a post about how you eat a Dutch Baby.  This is merely telling you how you can go about creating your own.  I'll quickly share that I eat mine with my hands, taco style wrapping the pastry around the fruity-creamy mess and I dredge whatever's in hand right on through any remaining butter!  It's not pretty but its sure tastes good so, no shame here!

Mixed Berry.JPG Ricotta with fruit.JPG Strwberry shortcake.JPG Peaches and Cream.JPG Blueberry ricotta and flax.jpg

Ingredients

  • 2 eggs
  • 1/2 cup milk
  • 1/2 cup flour
  • 1/2 stick butter

Directions

  1. Preheat oven to 410 degrees F.
  2. Mix the eggs, milk and flour together in a bowl until thoroughly combined.
  3. In an oven safe skillet, melt the butter on the stove stop.
  4. Carefully swirl the butter in the pan and around the edges to coat all sides.
  5. Pour the batter into the pan and carefully transfer it to the oven.
  6. Bake for 13 minutes at 410 degrees F, then turn the oven down to 350 degrees F and bake for another 10 minutes.
  7. I strongly encourage watching your Dutch Baby change shape through the oven window (cheap thrills!) but whatever you do, don't open the oven door until it is finished cooking or it will begin to deflate.
  8. When it's done baking, remove it from the oven and top it with the topping combo you decide. Chef's choice!
  9. Slice and serve. Or hoard? Just saying...

PS- a fitness related post is coming soon cause... duh!


 How to Feed a Senior is a participant in the Amazon Services LLC Associates Program, which is an affiliate advertising program. If you choose to purchase items after clicking on these links, I will earn a small commission at no extra cost to you.

August 26, 2018 /Ashley Look
How to feed a senior, dutch baby, toppings, batter, recipe, terrain, topography, butter, German pancake, formulas, cast iron skillet, creamy, drizzle, fresh, dairy, cream cheese, ricotta, berries, fruit, Lodge Cast Iron
Recipes
6 Comments
Pumpkin hand pies with fresh whip cream.

Pumpkin hand pies with fresh whip cream.

Pumpkin Hand Pies With Fresh Whip Cream

November 28, 2017 by Ashley Look in Recipes

Nothing says Thanksgiving like pumpkin pie with fresh whip cream, but why not give the traditional recipe a holiday boost by making pumpkin hand pies? Hand pies make life easier when it comes to clean-up. No plates, no forks, no knives to messy up when slicing. Just a grab and go snack to help celebrate the season. And just in case you need a little soundtrack for inspiration, allow me to introduce you this gem!

Debi Smith and Doc Watson actually have a song called “Pie”. Ugh… ok! Don’t ask how I came across this but it couldn't be more fitting, especially if we are talking about my Dad. It’s difficult at times posting recipes because he is increasingly picky and often refuses to eat what I make. But... not when it comes to hand pies! I'm honestly not surprised given his tendency towards sweets and their hand-held convenience.  As his dementia's been worsening, he's slowly losing his mobility and competency with utensils.

As for making these pies, just know you have options.  I used this recipe for the dough.  It utilizes cream cheese which compliments pumpkin but also contributed to a soft pastry crust that I knew would be easily eaten. As with many seniors, aging teeth or dentures can be a real deterrent when it comes to food so the softer the better.  You can however use store bought crust if you are short on time or seek out a basic pie crust recipe. Like I said, you have options!

More pumpkin hand pies...

More pumpkin hand pies...

As for the filling... I roasted a Fairytale Pumpkin earlier in the week and wanted to use it up.  You can absolutely use canned pumpkin which might allow you to skip over pre-baking the filling (see below). Using the fresh pumpkin was much too runny in my case and if it's too wet, it will damage the dough.  Don't be afraid to bake the filling first if necessary.

Filling Ingredients:

  • 2 cups pumpkin puree
  • 1/2 cup sugar
  • 1 tsp. cinnamon
  • 1 tsp. ground ginger
  • 1/2 tsp. nutmeg
  • 1/2 tsp. salt
  • 2 eggs
  • splash of cream

Directions:

  1. Combine all ingredients in a bowl and mix well. (If your filling is thick then you can immediately fill your hand pies. I used fresh pumpkin and the filling was very wet. I pre-baked the filling in mini muffin cups for 15 minutes until the custard solidified and used that as my filling.)
  2. Roll-out your dough and cut out circles with a biscuit cutter if you have one. (I used a pint glass to cut-out circles.)
  3. Roll out each circular cut-out to about 1/8 inch thickness and top one side with some filling.
  4. Wet the outer edges of the dough with a little water, fold over, and seal the edges by pressing down with a fork.
  5. Brush tops with an egg wash and poke a few holes to vent steam in each one.
  6. Bake at 375 degrees F for 20-40 minutes or until the dough becomes a golden brown.
  7. After baking, cool on a rack.

When it comes to the fresh whip cream just add a teaspoon of vanilla extract and a teaspoon of powdered sugar to some heavy whipping cream and whip on high until stiff peaks form.  Then dip the hand pies in it until your hearts content!

November 28, 2017 /Ashley Look
how to feed a senior, pumpkin, hand pies, whip cream, dough, cream cheese, seniors, dementia, Thanksgiving, Pumpkin recipe, Doc Watson, Debi Smith, Thanksgiving soundtrack, holiday recipe, pumpkin pie recipe, easy clean-up, grab and go recipe, Fairytale Pumpkin, #how2FairytalePumpkin, Winter Squash Bingo
Recipes
Comment
Using cultured butter in your pie crust makes for the best pie crust!

Using cultured butter in your pie crust makes for the best pie crust!

Cultured Butter Pie Crust Recipe

October 02, 2015 by Ashley Look in Recipes

Using cultured butter in your pie crust is a great way to enhance your pie dough cause, lets be for real… Quality crust comes from using quality ingredients and banging butter don’t disappoint! Throw in the addition of cream cheese and you got recipe for culinary success. It’s a crust where texture meets flavor. Where Mmmmmm is matched with yum… And who are we kidding? Pie is always about the crust! So why not park the pie recipe for a moment and let crust have its moment in the spotlight! Seriously, I made hand pies instead of traditional pie because, crust, Crust, CRUST! It’s really all about the crust! That’s a pie’s foundations so it needs to measure up.

As I mentioned, there are two critical ingredients that make this crust a gem:

1.       Cream Cheese- For those of you already familiar with the thrills of cheddar cheese as a crust addition, then you will be excited to learn that cream cheese can similarly add depth to your flavor profile.  It also works to enhance the texture of the crust by adding lightness to the dough.  It responds like butter and is easily kneaded, so this is an obvious win!

2.       Cultured Butter- Does “cultured” really make a difference? Is it worth the higher price tag?  I would say “yes and no.”  You can certainly use regular butter in this recipe but if you want to stand out from the crowd, then cultures (aka: probiotics) are key, as they are truly magic makers, when combined with prebiotics which are commonly found in fruit and grains.  Cultured butter also has a higher fat content and is therefore lower in moisture which helps the crust in attaining that light and flaky texture.  (Ugh... and don’t get me started on “fat is bad” blah, blah…  If you still subscribe to that line of thinking, you can brush-up on your nutrition knowledge here.)

Ingredients:

  • 2 cups flour
  • Pinch of salt
  • Pinch of sugar
  • 1 cup cultured butter (unsalted)-softened
  • 8 oz package of cream cheese- softened

Directions:

  1. In a bowl combine the flour, salt and sugar and set aside.
  2. In another bowl add the butter and cream cheese and mix thoroughly till combined.
  3. Once mixed, slowly add your dry ingredients to the butter/cream cheese mixture, working it together to form the dough.
  4. After the dough is formed and all the ingredients are fully incorporated, divide the dough in half and form two round disks.
  5. Cover in plastic wrap and refrigerate for an hour or until you are ready to use.

    *I used one disk to make a bunch of the hand pies in the image above, and the other to make a top and bottom crust for a more traditional version of apple pie. Both were good, and really just a decision based on time. If you have the time, attempts some hand pies! They are fun and different.

Final Thoughts

Cultured foods like yogurt, kimchi, miso and kombucha have gained popularity after science has determined that live bacteria help support the development and maintenance of healthy gut flora.  Yes, it is possible that those bacteria are no longer living after baking but their contribution still plays an important role when it comes to flavor.  Baked or not, cultured butter deserves a spot in any kitchen!  You can always attempt your own version with this recipe. And if you really want hand pies, well I have a recipe for that too!

October 02, 2015 /Ashley Look
hand pies, cultured butter, probiotics, prebiotics, cream cheese, apples, pie crust, apple pie, cultures, crust, bacteria, how to feed a senior, Cultured Butter Pie Crust Recipe, flaky pie crust, gut flora, traditional apple pie
Recipes
Comment
 
Search